
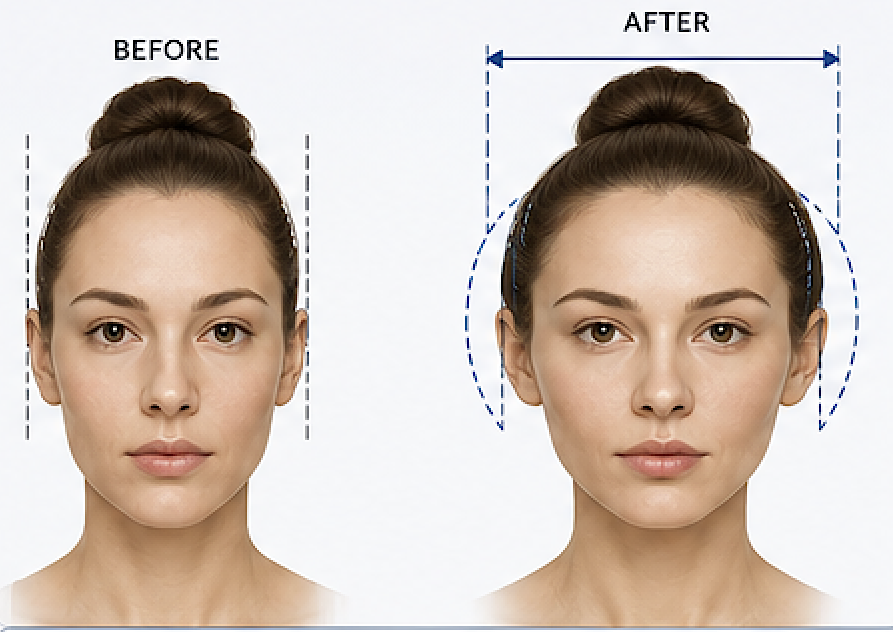
 Female head widening implants are designed to increase the bitemporal width (side-to-side dimension) of the skull in women whose heads appear disproportionately narrow. The goal is not to create a masculine appearance, but rather to produce a smoother, more balanced, and naturally oval cranial shape.
The most common indications include:
- Congenitally narrow head shape with reduced parietal width.
- Vertical head dominance, where the head appears tall rather than wide.
- Correction of cranial disproportion in patients with otherwise balanced facial features.
- Asymmetry, where one side of the head is noticeably flatter or narrower.
- Desire for a softer, more feminine cranial contour, particularly when viewed from the front and three-quarter views.
- Revision of previous skull contouring surgery or correction of contour irregularities.
Ideal candidates have normal scalp elasticity and realistic expectations regarding the achievable increase in width, which is typically 5–8 mm per side, depending on scalp stretch and the patient’s aesthetic goals.
Implant Design Principles
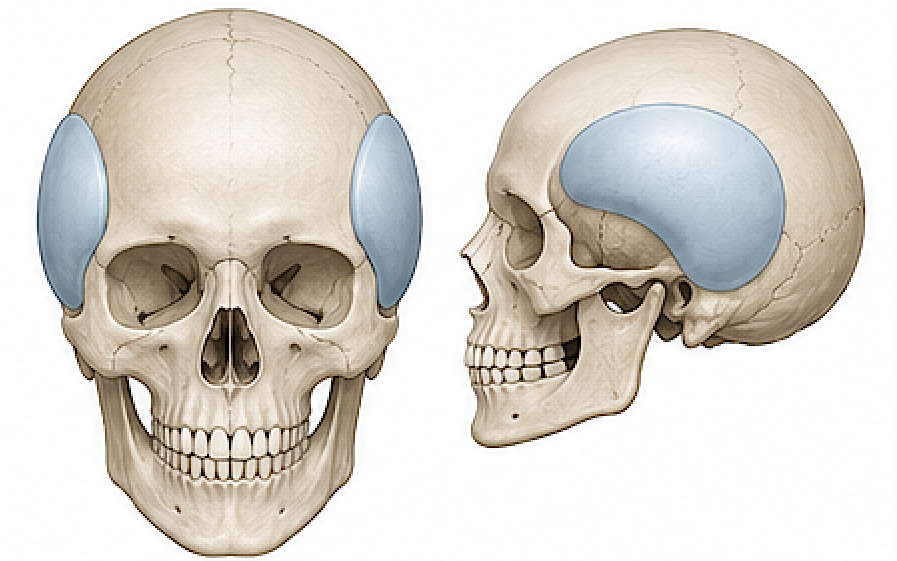
Unlike temporal implants, head widening implants are custom-designed cranial implants based on a high-resolution CT scan.
Key implant characteristics include:
- Mirror-image bilateral implants placed over or under the temporal muscles depending upon involvement of the lateral forehead (crossing the bony temporal line)
- Thin feathered edges that taper smoothly into the surrounding skull to eliminate palpable or visible transitions.
- Maximum thickness located over where the width enhancement is most aesthetically effective, usually mid-temporal or above the ears
- Extended superior and posterior blending, avoiding a localized “bulge” appearance.
- Custom CAD/CAM fabrication, matching each patient’s skull anatomy for precise fit and minimizing dead space.
The objective is a broad, smooth, continuous increase in cranial width, not a focal prominence. The implants should create a gentle outward curvature that appears completely natural from the frontal, oblique, superior, and posterior views.
For female patients specifically, the design emphasizes:
- Preservation of a smooth oval silhouette.
- Avoidance of excessive lateral projection.
- Symmetrical widening that complements facial width rather than overpowering it.
- Seamless blending into the temporal and occipital contours for an elegant, feminine head shape.
Case Study
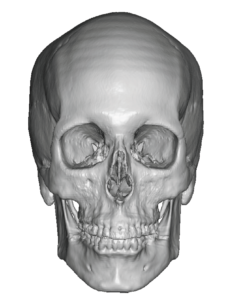 This female had long been bothered by her narrow head shape which had a pinched look. Her 3D CT scan showed a narrow bitemporal width but a forehead width that was not particularly narrow.
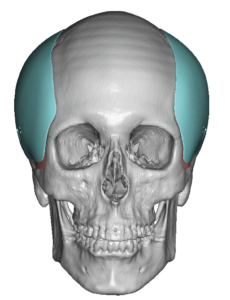
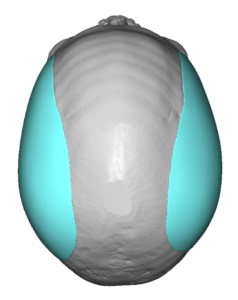
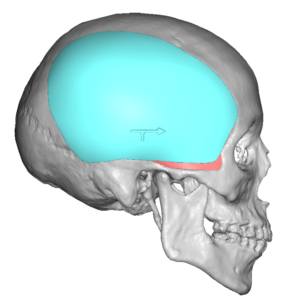 Head widening (extended temporal implants) were designed with 6 mm of maximum projection over the area just above the ears. From the central projecting point, the implant design taper down to find edging at the anterior and posterior areas. Total implant volume of both sides was 93 ccs.
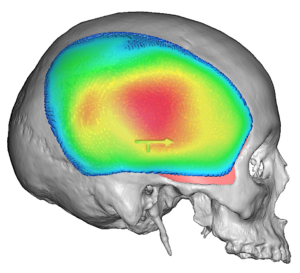
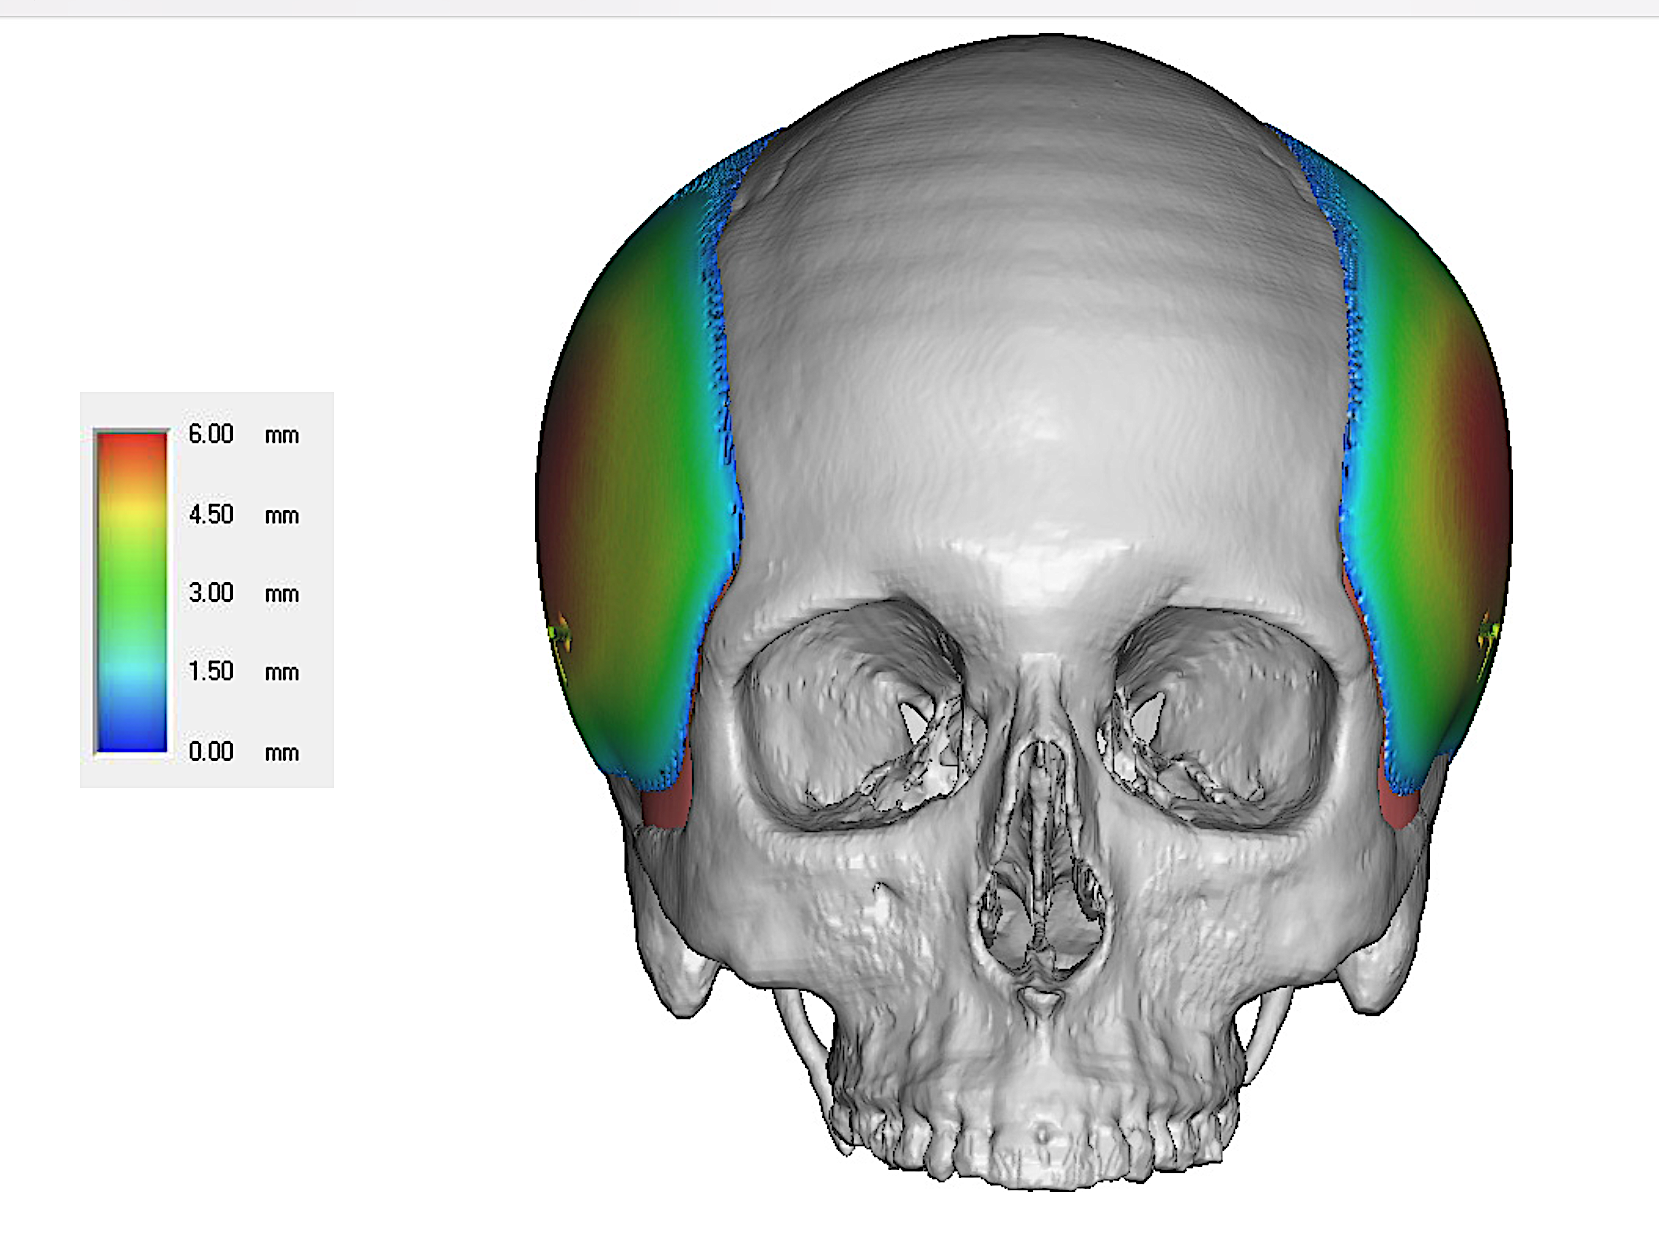 The distribution of the implant thicknesses can be seen in the color thickness mapping.
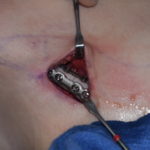
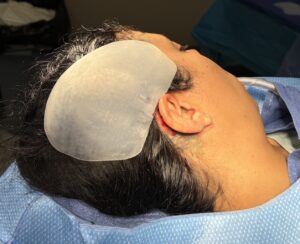 The head widening implants are placed through incisions behind the ear in the postauricular sulcus. Placement in this case was submuscular as the implant design stopped short of the temporal bony line.
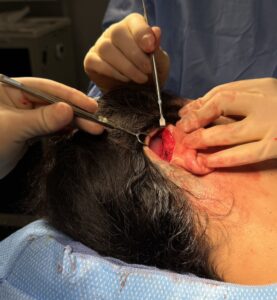
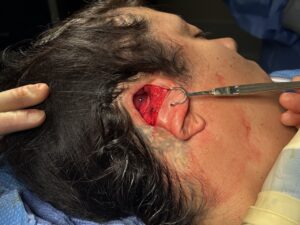 Each custom implant is folded for insertion through the limited incisional length. Once beneath the muscle, the implant immediately is returned to its pre-designed shape and is positioned over the lateral temporal skull.The implants are aligned using predetermined bony landmarks established during the computer-aided design process to ensure symmetrical placement.The feathered implant edges blend gradually into the surrounding skull without creating visible or palpable transitions.Although the implant pocket is designed to provide a stable, exact fit, rigid fixation is preferred. Each implant is secured with one or two low-profile titanium microscrews placed through the implant. Because the screws are very small and buried beneath the scalp, they are not visible or palpable.
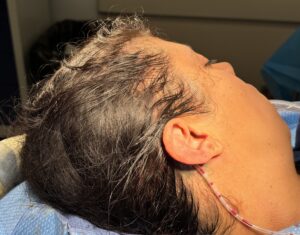 The surgical site is irrigated thoroughly before closure.A drain is usually used due to expected fluid accumulation that will occur in the first few days after surgery. The small postauricular incision is closed in multiple layers with absorbable deep sutures and fine sutures for the skin. A light compressive head dressing is applied for the first postoperative day.
Recovery
- Patients return home the next day.
- Swelling is generally mild to moderate and peaks during the first 48 to 72 hours.
- Most patients resume non-strenuous daily activities within one week.
- Exercise is typically resumed after approximately three weeks.
- Hair washing is usually permitted within several days after surgery.
- Final contour refinement occurs over several months as the scalp fully adapts to the new cranial shape.
Her two year result showed good improvement in her bi temporal width with no long-term complications.
Discussion
The success of head widening implants depends more on implant design than on the surgical placement. A well-designed implant creates the illusion of a naturally wider skull by producing a smooth, continuous increase in cranial width rather than a localized bulge. Every implant should be custom designed from a high-resolution 3D CT scan to match the patient’s unique cranial anatomy.
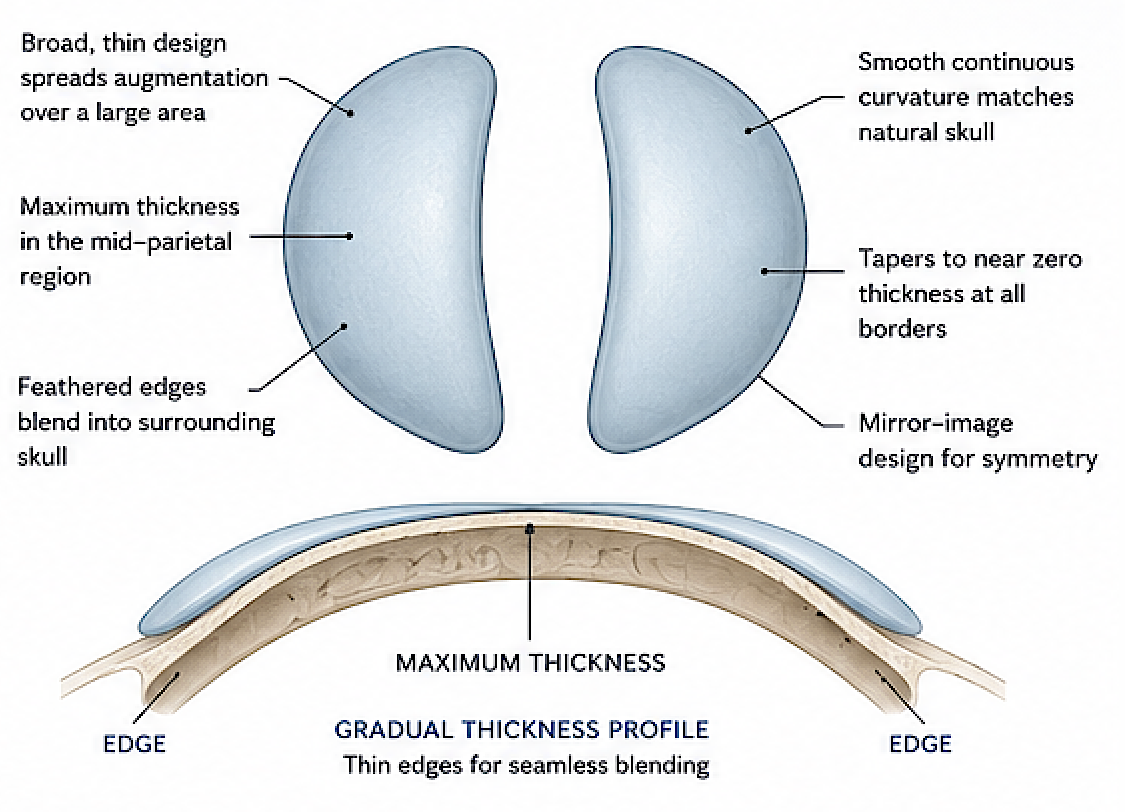
1. Determine the Desired Final Head Width
The design process begins by defining the target biparietal width.
- Evaluate the skull from frontal, top, and posterior views.
- Assess head width relative to facial width and head height.
- Determine the desired increase in width, typically 3-6mms per side in women and 5 to 8mm per side in men, although greater augmentation is possible depending on scalp laxity.
- Ensure that the final width remains proportional to the overall facial width
2. Maximize the Area Rather Than the Thickness
A common design error is concentrating projection into a small implant.
Instead:
- Use the largest practical footprint.
- Spread augmentation over a broad portion of the lateral parietal bone.
- Favor gradual contour change over focal projection.
Large, thin implants almost always produce a more natural result than small, thick implants.
3. Position the Maximum Thickness Correctly
The point of greatest projection should generally lie:
- Over the middle third of the temporal bone.
- Posterior to the coronal suture.
- Usually halfway between the ear inferiorly and the bony temporal line superiorly
This location creates true head widening without producing excessive temporal fullness.
4. Preserve Normal Cranial Curvature
The implant should continue the existing skull curvature.
Avoid:
- Flat implant surfaces.
- Abrupt changes in curvature.
- Sudden increases in thickness.
The implant should appear as though the skull itself naturally developed with greater width.
5. Feather Every Edge
Edge transition is one of the most important design features.
The implant should taper to nearly zero thickness:
- Anteriorly toward the temporal line.
- Superiorly toward the vertex.
- Posteriorly toward the occipital region.
- Inferiorly above the squamous temporal bone.
A broad feathered transition eliminates palpable or visible implant borders.
6. Avoid Excessive Inferior Extension
The implant should not descend too low onto or below the zygomatic arch anteriorly..
Inferior extension can produce:
- Abnormal low temporal fullness.
- Implant edge bending .
- More difficult surgical placement.
The inferior border should generally remain above the zygomatic arch anteriorly and above the mastoid process posteriorly
7. Maintain Bilateral Symmetry
For symmetric skulls:
- Mirror-image implants should be used.
For asymmetric skulls:
- Independent right and left designs should restore overall head symmetry rather than simply matching implant dimensions.
The goal is symmetry of the final head shape, not necessarily symmetry of implant thickness.
8. Blend with Adjacent Cranial Regions
The implant should transition naturally into:
- The frontal-parietal junction.
- The occipital-parietal junction.
- The superior temporal region.
No individual implant should appear visually distinct from the surrounding skull.
9. Design for Surgical Placement
The implant should be designed with surgery in mind.
Important considerations include:
- Flexible solid silicone construction.
- Ability to fold through a limited scalp incision.
- Smooth undersurface matching the skull surface.
- Stable seating within a precisely developed subperiosteal pocket.
- Implant orientation markers
10. Consider Hair and Soft Tissue Thickness
The final visible contour depends on scalp thickness.
Patients with:
- Thick hair and thicker scalp can tolerate greater augmentation.
- Thin scalp or sparse hair require broader transitions and more conservative projection to avoid contour visibility.
Female-Specific Design Principles
Female head widening aims to create a softer, more oval cranial silhouette rather than a broad, square appearance.
Key features include:
- Moderate lateral expansion with wide surface coverage.
- Gentle, continuous curvature.
- Broad feathered borders.
- Smooth integration with the frontal and occipital contours.
- Preservation of feminine cranial proportions from the frontal, oblique, and superior views.
The aesthetic objective is not simply to make the head wider, but to create a balanced cranial shape that harmonizes with the face and appears indistinguishable from natural anatomy. A successful custom implant is one that cannot be recognized as an implant at all—it simply gives the appearance of a naturally well-proportioned skull.
Barry Eppley, MD, DMD
Plastic Surgeon