
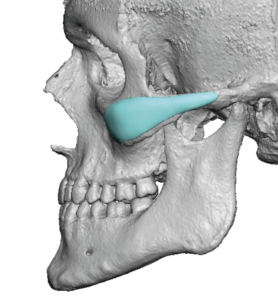
When designing a custom zygomatic arch implant, the primary goal is usually not projection but controlled lateralization of the arch to create the desired increase in upper facial width while maintaining a natural skeletal contour.
Key Design Parameters
1. Amount of Width Increase
This is the most important variable.
Typical augmentation:
- 3–5 mm per side: usuall amoiunt of widening for most patients
- 5 – 7 mm per side: aignificant widening
- > 8 mm per side: large/extreme widening, rare
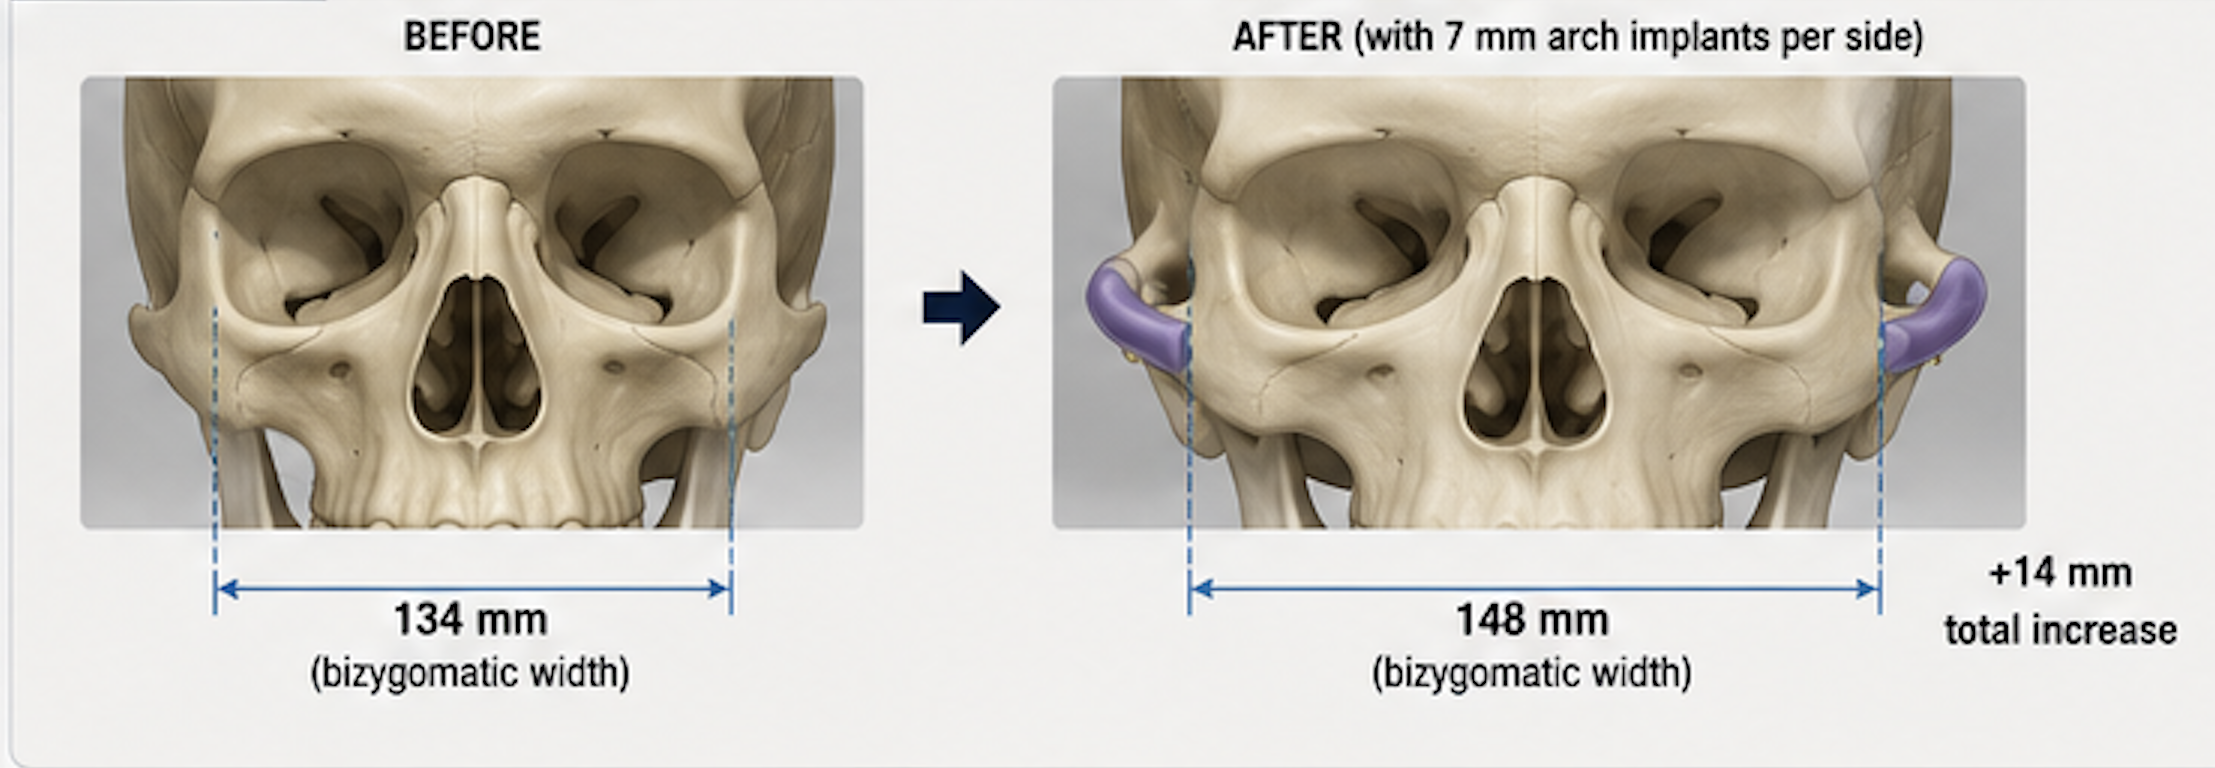
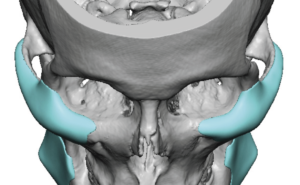
Because width increases on both sides, a 7 mm implant per side creates approximately 14 mm of total bizygomatic width increase.
2. Location Along the Arch
The implant can emphasize:
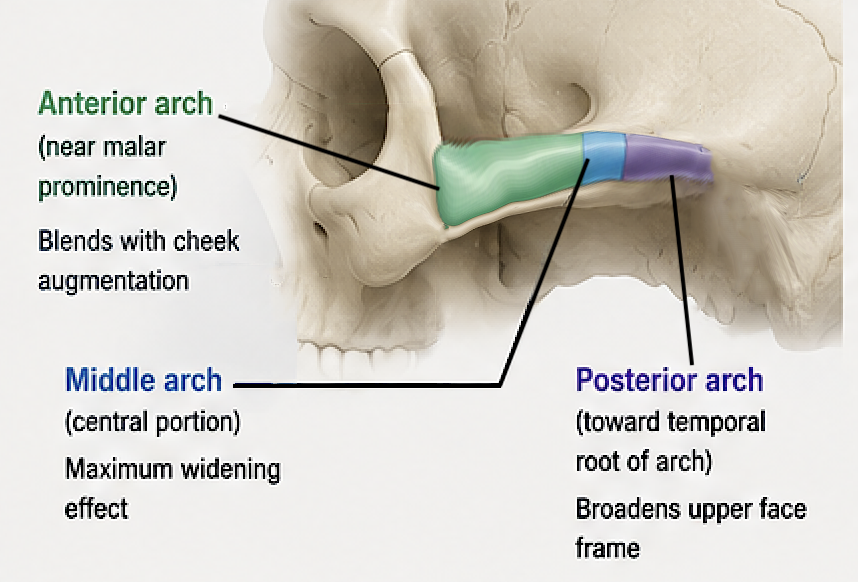
Anterior arch
- Near the malar prominence
- Blends with cheek augmentation
- Creates more three-quarter-view definition
Middle arch
- Maximum widening effect
- Often the ideal location for skeletal expansion
Posterior arch
- Extends toward the root of the arch near the ear
- Produces a broader upper-face frame
- Must be designed carefully to avoid visibility in thin tissues
3. Shape Profile
A custom implant can be designed as:
Uniform width increase
This means that the width increase is the same along its whole length
Central Flare
Most projection occurs in the middle or front part of the arch.
Posterior flare
Creates width farther back toward the temporal region.

4. Vertical Position
The implant can:
- Stay centered on the arch
- Add slight superior fullness
- Add slight inferior fullness
Most aesthetic designs remain centered to preserve natural anatomy.
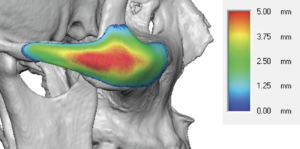
5. Edge Transitions
One of the most important features of custom design.
The implant should:
- Feather gradually into native bone
- Avoid abrupt step-offs
- Extend sufficiently beyond the area of maximal augmentation
A well-designed implant is often almost invisible on CT except at the area of maximum projection.
Stand-Alone vs Combined Designs
Pure Arch Implant
Used when:
- Cheek projection is already adequate
- Face is narrow
- Goal is width only
Front view:
| |
/ \
/ \
After widening:
| |
/ \
/ \
Malar-Arch Implant
Most common custom design.
Advantages:
- Adds anterior cheek projection
- Adds lateral width
- Creates a continuous cheekbone contour
This avoids the appearance of having a prominent arch but a flat anterior cheek.
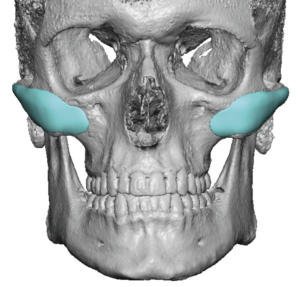
CT-Based Design Considerations
When designing from a 3D CT:
- Measure current bizygomatic width.
- Evaluate temporal hollowing.
- Determine cheek projection relative to orbital rim.
- Assess soft-tissue thickness over the arch.
- Simulate different lateralization values.
- Ensure the implant does not encroach on the temporalis muscle origin.
The best custom designs are usually judged from:
- Frontal view.
- Three-quarter view.
- Skeletal overlay measurements.
The actual implant often looks surprisingly small on the computer model; even a 5–7 mm lateral displacement of the arch can produce a noticeable increase in facial width.
Dr. Barry Eppley
Plastic Surgeon